Everyone who knows me, knows how much I like to can. I learned how at an early age from my grandma and it "stuck." I've probably been canning for my family for about 20 years now and I was thinking I was pretty good at it--after all, no one who has eaten my canned food has died yet, so I must be doing things right. Well, then came the Mother Earth News Fair, where I attended two classes on preserving food, and I realized I didn't know everything there is to know about canning after all!
I'll give a brief explanation of the easiest, safest ways to can and then pass on some tips I learned at the fair.
Canning Basics
There are two methods of canning; the boiling water bath method and the pressure canning method. Boiling water bath canning is for foods that are high in acid content such as fruits, vegetables that have some sort of pickling aspect in their recipe, and tomatoes that have had some sort of acid added to them, be it lemon juice or vinegar. Pressure canning is used for all meat, dairy products, seafood, poultry, and all vegetables that haven't been pickled. Never use the boiling water method for canning any meats/dairy, etc. or you will be sure to poison your family!
I know a lot of people are intimidated by pressure cookers and/or pressure canners, but the technology used in today's pressure cookers/canners is vastly improved upon the type our moms or grandmas used. Whenever I mention I cooked something in a pressure cooker, I always get asked, "But, doesn't that make you nervous?" My answer is always NO. Pressure cookers/canners have all sorts of reliable safety systems built in to avoid some of the problems in the past. Companies who manufacture this equipment certainly wouldn't appreciate their customers getting blown up in their kitchens! Take some time to research the best pressure cooker/canner for your own use and when you get it, read the instruction manual carefully to ensure you are familiar with your equipment. I've used a pressure cooker for 20 years and I haven't exploded yet!
Equipment:
-A pressure canner if you are preserving meats, dairy, poultry, vegetables that aren't pickled.
-A large stock pot with a tightly fitting lid, if you're doing the boiling water method.
-A rack (either wooden or metal) for the bottom of the stockpot so water can circulate under and around your canning jars
-Canning jars. Mason or Ball jars are the best choice for canning and they can be used over and over again, provided there are no nicks or cracks in the jars. I usually find the quart jars to be best when I'm canning things like tomato sauce or chili, and the pint jars to be the best when I'm making jam or jelly. If I have to buy new jars, I find Walmart to be good on prices but I just saw our new Wegmans sells jars at a pretty good price, too. I've also bought canning jars at yard sales and haven't had a problem with them yet. You must buy new lids for your jars, though, as they can not be reused, no matter what. A company called Tattler sells reusable canning jar lids that are made out of plastic, http://www.reusablecanninglids.com/ but I haven't tried them myself so I have no idea of how well they work.
-Canning accessories. These are the tools you will use in the canning process for either canning method
Canning tongs: allow you to safely remove jars from hot water
Funnel: fits snugly on jar rim, allowing you to pack your jars neatly and not get food on the jar rims (food left on rims doesn't allow for a tight seal)
Jar Packer: okay, it really does have some fancy proper name but I can't remember what it is so I've always called it a jar packer. Basically, you use this tool to push/pack the foods into the jars tightly (so they don't float) and to remove air bubbles from your jars. You can also just use a chopstick if you don't want to buy this tool.
Lid Wand: this handy-dandy tool has a magnet on the end of it and it is perfect for removing lids and rings from their hot water soak. Before I got this tool, I used to spend many frustrating minutes chasing lids and rings around the bottom of my stock pot with a chopstick.
Kitchen Towels and Paper Towels: since canning involves water, it's a good idea to have kitchen towels handing for sopping up any wayward water spills. I also keep paper towels on hand for wiping the rims of my jars before putting the lids on so I don't get any lint or fuzz on the jars (like you might with a regular cloth towel).
Kitchen Timer: you need to keep track of your processing time. I once got distracted making pickles and the result was that my pickles turned out soggy from me leaving them in the hot water longer than I was supposed to. I was only supposed to "blanch" them and I ended up boiling them instead!
Cookie Sheets: I keep a few cookie sheets around during canning so I have a way to transport a bunch of jars from say, the kitchen counter to the kitchen table so I can free up space on my counters.
Kosher Salt or Pickling Salt: never use just plain old salt. It usually is iodized and that can give a metallic taste to your canned foods or even change the color of your pickling brine. I can usually find either at the grocery store, but if you're having trouble, just ask them to point you in the direction of the Kosher food section and you should be able to find it there.
-Choose your recipe. I use the Ball preserving recipe book and have had good results. They have a great website, too which has a lot of good information on canning and some really good recipes: http://www.freshpreserving.com/recipes.aspx It's not a good idea to follow the guidelines for canning in old family recipes. For instance, you could use an old recipe for jam (which I have) but make sure the amount of sugar, pectin, etc. matches up to a recipe from today so you're conforming to today's canning standards. For instance, I had to use 1/2 the sugar but double the pectin. It took a few tries but I finally got it right.
-Use high-quality and fresh ingredients. Don't can fruits or veggies that are wilting or just about to bite the dust. Trust me, the only thing worse than eating crappy rotten fruit/vegs today, is opening a jar of crappy rotten fruit/vegs six months from now. Yuck!
Boiling Water Canning Method:
Wash your lids, rings, and canning jars in hot, sudsy water. Rinse with warm water and then leave on a kitchen towel to dry. You don't need to sterilize everything ahead of time; the boiling water during processing will do that for you.
Now rather than try and tell you step-by-step what to do, because I am lazy, I'm just going to copy/paste instructions from the canning website I like to use. http://www.canning-food-recipes.com I could re-word it so it sounds like my own but they say it so well and I couldn't do a better job if I tried. So here goes:
Equipment Preparation
Wash and assemble canning equipment, utensils and containers. Make sure you have everything that you need before you start fruit preparation. Once you begin the canning process you need to work as quickly as possible without delays.
Ball Canning Jars
Use authentic Mason or Ball canner jars. Examine and discard those with nicks, cracks and rough edges. These defects will not permit an air-tight seal. All jars should be washed in hot soapy water, rinsed well and then kept hot. This can be done in a dishwasher or by placing the jars in the water that is heating in your canner. The jars need to be kept hot to prevent breakage when they are filled with a hot product and placed in the kettle for processing.
Jars that will be filled with food and processed for less than 10 minutes in a boiling water bath canner need to be sterilized by boiling in water for 10 minutes. NOTE: If you are at an altitude of 1000 feet or more, boil an additional minute for each additional 1000 feet of altitude. (i.e.) 5000 feet=5 minutes longer.
Fruit Preparation
Gather fruit and vegetables early in the morning when they are at their peak of quality. Do not use over-ripe products. Gather or purchase only as much as you can prepare within 2 or 3 hours.
Wash products by either quick soaking and/or rinsing making sure to remove all dirt and sand including any chemicals that may be present. Dirt contains some of the bacteria that are hardest to kill. The cleaner the raw foods, the more effective the preserving process. Do not can decayed or damaged fruit. Do not let the food soak; it will lose flavor and nutrients.
Water Bath Canners
Fill the kettle with the appropriate amount of hot water and begin heating it on the range. The water bath requires 1 to 2 inches of water above the tops of jars. This can be difficult to determine before the filled jars are in place but after a batch or two you will learn how much water you you have to add. It is always a good idea to have an extra small pot of water heating just in case.
Packing Jars
Raw Pack (Cold Pack)
Pack raw fruit into jars and cover with boiling hot sugar syrup, juice or water. It is necessary to leave a head space between the lid and the top of food or liquid. This space is needed for the bubbling of liquids and fruit expansion. If the jars are filled too full the contents may overflow during processing. The amount of head space is usually between 1/8 and 1/2 inch. Check the individual recipe for the exact amount of head space.
Hot Pack
Heat fruit in syrup, in water or over steam before packing. Fruits with a high juice content and tomatoes can be pre-heated without adding liquid and then packed in the juice that cooks out.
To Fill Jars
Pack each jar to within 1/4 inch of top or as specified in individual recipe. For non-liquid foods(ie. peaches) it is necessary to remove any trapped air bubbles by running a rubber spatula or table knife gently between the solid product and the edge of the jar. Add more hot syrup as needed. Wipe rim and screw threads with a clean damp cloth, place lid on top and screw bands on tightly and evenly to hold rubber sealing lid (or sealing ring) in place. Sometimes it is necessary to position and hold down sealing lid while you tighten the band to insure the lid is centered on the top of the jar. Do not over-tighten. Jars are then ready to be placed on the rack inside hot water canner.
General Processing
Water Bath Method
Place jars on rack immediately after packing. Lower filled rack into canner. Jars should be covered by 1 to 2 inches of water. Add additional boiling water if needed. If you add more water, pour between jars and not directly on them (this is where the extra pot of heated water comes in handy). Cover pot with lid. When the water comes to a rolling boil, start to count the processing time. Boil gently and steadily for the time recommended for the food being processed. When the cooking time is up, remove jars at once and place on a rack or on towels away from heat and away from any draft.
Test for Seal
After jars have cooled between 12 and 24 hours after processing, check seal. To do this press down on the center of the lid. The lid should be con-caved and not move when pressed. Another method is to tap the lid with the bottom of a teaspoon. If the jar is sealed correctly, it will make a high-pitched sound. If it makes a dull sound it means the lid is not sealed or possibly that food is in contact with the underside of the lid. Do not be alarmed if during the first the first hour or so of cooling if you hear a popping sound come from the jars. This is a good sound to hear as it most often means that the vacuum effect has taken place which causes the lids to pop down and seal.
After jars have cooled thoroughly, the screw bands may be removed if desired. Be sure to label canned jars with content and processing date. Store jars in a cool dark, dry place.
Canned fruits oftentimes will float if the sugar syrup is too heavy, if jars are packed too loosely or if air remains in the tissues of the fruit after processing. To avoid this use a light or medium sugar syrup, make sure fruit is firm and ripe and pack fruit tightly in jars without crushing.
Canned peaches, pears and apples may show a blue, red or pink color change after processing. This is sometimes the result of natural chemical changes that occur as fruits are heated.
-Lift your jars straight up out of the water, don't tilt them to get the water off (I admit, I have always done this!) The water will evaporate off the lids while the jars are cooling. Tilting the jars could push food up into the headspace. Whoops! Guess I'll be pulling my jars straight up and out of the water from now on.
-After 24 hours, once you have confirmed your jars have sealed, you're supposed to take the rings off the jars before storing them. Otherwise, moisture could build up under there and you could end up with rust, which could erode your seal. Good thing there's no such thing as the Canning Police or I would be in some serious trouble if they took a gander down in my basement and saw all of my numerous canning jars with rings still on them. That's a big oops 10-4 right there!
-Canning jars can be FROZEN, lids and all! I have made freezer jam with those plastic freezer canning containers before but I never knew you could freeze the actual glass jars before. This tip really would have come in handy that time my veggies didn't seal right and I was forcing everyone to eat tons of veggies every day to use them up before they went bad! Probably not a good idea for things like pickles, though. I imagine they'd probably turn to mush.
Finally, to round out our boiling water canning method discussion, here's a recipe given to us by one of our canning instructors at the fair. Her name is Sherri Brooks Vinton and this recipe comes from her new book, "Put 'em Up!, a Comprehensive Home Preserving Guide for the Creative Cook. From Drying and Freezing to Canning and Pickling." I reallllly wanted to pick up Sherri's book at the fair as she was so knowledgeable and pretty down to earth, but I waited too long and they sold out. I'll have to see if I can find it online. Anyhow, here's Sherri's recipe for Spicy Carrots:
Spicy Carrots
Ingredients:
4-6 garlic cloves, sliced
1-2 jalapeno peppers, sliced, with seeds
1 tsp. red pepper flakes (optional)
2 lbs. carrots
4 C. distilled white vinegar
1 C. sugar
3 TBSP. Kosher salt
Prepare:
1. divide the garlic, sliced jalapenos, and pepper flakes (if using), among three clean, hot, pint canning jars. Trim, peel, and cut the carrots 1 inch shorter than the height of the jars. Pack the carrots into jars.
2. bring the vinegar to a boil in a large non-reactive saucepan. Add the sugar and salt and stir to dissolve. Pour the brine over the carrots, covering the vegetables by 1/2 inch with liquid. Leave 1/2 inch of headspace between the top of the liquid and the rim of the jar.
Can:
Use the boiling water method. Release trapped air bubbles. Wipe the rims clean; center lids on the jars and screw on jar bands, just until they are secure--do not tighten! Process for 15 minutes (from when the water starts to boil). Turn off heat, remove canner lid, and let jars rest in the water for 5 minutes. Remove jars and set aside for 24 hours. Check seals, then store in a cool, dark place for up to one year.
Pressure Canning
Once again, I bow to the expertise of the folks at Canning Food Recipes.com and give you their directions for pressure canning:
Follow manufacturer's instructions for opening and closing the pressure canner. Have 2 to 3 inches of hot water in pressure canner and stand the jars on the rack insert so they are not touching each other or the sides of the pot. Fasten lid and turn on heat. Steam, mixed with air, will start to flow from the vent. This is about 8 to 10 minutes after the first sign of steam. As the air is driven out from the canner, the steam will change from a white vapor or cloud to nearly invisible.
Start processing time when pressure has been reached or when weighted gauge begins to rock. It is then time to close the the pet-cock or regulator. Maintain a steady pressure during processing.
When processing time is up, remove the canner from heat and let the pressure return to zero without assistance. Standard heavy-walled canners take about 30 minutes when loaded with pints and about 45 minutes when loaded with quarts. Do not attempt to cool pot with cold water. This can cause liquid to escape from jars and keep lids from properly sealing. It can also cause pot warpage.
After pressure reaches zero, wait 2 minutes longer and then slowly open or remove the pet-cock or regulator. Unfasten cover and tilt the far side up so any steam remaining will escape away from you. Using a jar lifter, remove each jar and place on a dry, non-metallic surface or towel. Leave space between jars for air circulation.
After jars have cooled, test for seal and the screw bands may be removed if desired. Be sure to label canned jars with content and processing date. Store jars in a cool dark, dry place.
Processing Times
Processing, or canning times, are usually for an altitude of 0 to 1000 feet. If you are canning at a higher altitude, the times will need to be increased. This is because water has a lower boiling point at higher altitudes. Because of the lower boiling temperature the processing time is increased to ensure that the harmful bacteria is destroyed.
Water Bath Canner
For the Boiling Water Bath method, process an additional minute for each 1000 feet in elevation. (i.e.) 5000 feet=5 additional minutes of processing time.
Dial Gauge Pressure Canner
For pressure canning at higher altitudes the time remains the same but the pressure needs to be increased.
2000 to 4000 feet, 12 pounds pressure.
4000 to 6000 feet, 13 pounds pressure.
6000 to 8000 feet, 14 pounds pressure.
I find that I enjoy pressure canning more than the boiling water method. It's less messy and you know for sure your food is being safely processed. Plus, you don't have to constantly check to make sure there's enough water covering your jars or add water if it runs low. There's also something kind of satisfying about harnessing the power of steam in your kitchen. Must be something that rubbed off from Hubs taking me to see so many steam trains over the years! So that's all for today's lesson, folks. If you have any favorite canning recipes or tips, please leave them in the comments section or shoot me an email rebeccacichonowicz@gmail.com and I'll include them in my blog. Thanks again for reading! The next "lesson" will be on how to grow Shitake mushrooms. :)
I'll give a brief explanation of the easiest, safest ways to can and then pass on some tips I learned at the fair.
Canning Basics
There are two methods of canning; the boiling water bath method and the pressure canning method. Boiling water bath canning is for foods that are high in acid content such as fruits, vegetables that have some sort of pickling aspect in their recipe, and tomatoes that have had some sort of acid added to them, be it lemon juice or vinegar. Pressure canning is used for all meat, dairy products, seafood, poultry, and all vegetables that haven't been pickled. Never use the boiling water method for canning any meats/dairy, etc. or you will be sure to poison your family!
I know a lot of people are intimidated by pressure cookers and/or pressure canners, but the technology used in today's pressure cookers/canners is vastly improved upon the type our moms or grandmas used. Whenever I mention I cooked something in a pressure cooker, I always get asked, "But, doesn't that make you nervous?" My answer is always NO. Pressure cookers/canners have all sorts of reliable safety systems built in to avoid some of the problems in the past. Companies who manufacture this equipment certainly wouldn't appreciate their customers getting blown up in their kitchens! Take some time to research the best pressure cooker/canner for your own use and when you get it, read the instruction manual carefully to ensure you are familiar with your equipment. I've used a pressure cooker for 20 years and I haven't exploded yet!
Equipment:
-A pressure canner if you are preserving meats, dairy, poultry, vegetables that aren't pickled.
 | |
| A pressure canner such as this runs around $150-$200 brand new but you can find some | on E-Bay |
-A rack (either wooden or metal) for the bottom of the stockpot so water can circulate under and around your canning jars
-Canning jars. Mason or Ball jars are the best choice for canning and they can be used over and over again, provided there are no nicks or cracks in the jars. I usually find the quart jars to be best when I'm canning things like tomato sauce or chili, and the pint jars to be the best when I'm making jam or jelly. If I have to buy new jars, I find Walmart to be good on prices but I just saw our new Wegmans sells jars at a pretty good price, too. I've also bought canning jars at yard sales and haven't had a problem with them yet. You must buy new lids for your jars, though, as they can not be reused, no matter what. A company called Tattler sells reusable canning jar lids that are made out of plastic, http://www.reusablecanninglids.com/ but I haven't tried them myself so I have no idea of how well they work.
-Canning accessories. These are the tools you will use in the canning process for either canning method
 | |
| Clockwise, from top: canning tongs, funnel, jar packer, lid wand |
Funnel: fits snugly on jar rim, allowing you to pack your jars neatly and not get food on the jar rims (food left on rims doesn't allow for a tight seal)
Jar Packer: okay, it really does have some fancy proper name but I can't remember what it is so I've always called it a jar packer. Basically, you use this tool to push/pack the foods into the jars tightly (so they don't float) and to remove air bubbles from your jars. You can also just use a chopstick if you don't want to buy this tool.
Lid Wand: this handy-dandy tool has a magnet on the end of it and it is perfect for removing lids and rings from their hot water soak. Before I got this tool, I used to spend many frustrating minutes chasing lids and rings around the bottom of my stock pot with a chopstick.
Kitchen Towels and Paper Towels: since canning involves water, it's a good idea to have kitchen towels handing for sopping up any wayward water spills. I also keep paper towels on hand for wiping the rims of my jars before putting the lids on so I don't get any lint or fuzz on the jars (like you might with a regular cloth towel).
Kitchen Timer: you need to keep track of your processing time. I once got distracted making pickles and the result was that my pickles turned out soggy from me leaving them in the hot water longer than I was supposed to. I was only supposed to "blanch" them and I ended up boiling them instead!
Cookie Sheets: I keep a few cookie sheets around during canning so I have a way to transport a bunch of jars from say, the kitchen counter to the kitchen table so I can free up space on my counters.
Kosher Salt or Pickling Salt: never use just plain old salt. It usually is iodized and that can give a metallic taste to your canned foods or even change the color of your pickling brine. I can usually find either at the grocery store, but if you're having trouble, just ask them to point you in the direction of the Kosher food section and you should be able to find it there.
-Choose your recipe. I use the Ball preserving recipe book and have had good results. They have a great website, too which has a lot of good information on canning and some really good recipes: http://www.freshpreserving.com/recipes.aspx It's not a good idea to follow the guidelines for canning in old family recipes. For instance, you could use an old recipe for jam (which I have) but make sure the amount of sugar, pectin, etc. matches up to a recipe from today so you're conforming to today's canning standards. For instance, I had to use 1/2 the sugar but double the pectin. It took a few tries but I finally got it right.
-Use high-quality and fresh ingredients. Don't can fruits or veggies that are wilting or just about to bite the dust. Trust me, the only thing worse than eating crappy rotten fruit/vegs today, is opening a jar of crappy rotten fruit/vegs six months from now. Yuck!
Boiling Water Canning Method:
Wash your lids, rings, and canning jars in hot, sudsy water. Rinse with warm water and then leave on a kitchen towel to dry. You don't need to sterilize everything ahead of time; the boiling water during processing will do that for you.
Now rather than try and tell you step-by-step what to do, because I am lazy, I'm just going to copy/paste instructions from the canning website I like to use. http://www.canning-food-recipes.com I could re-word it so it sounds like my own but they say it so well and I couldn't do a better job if I tried. So here goes:
Equipment Preparation
Wash and assemble canning equipment, utensils and containers. Make sure you have everything that you need before you start fruit preparation. Once you begin the canning process you need to work as quickly as possible without delays.
Ball Canning Jars
Use authentic Mason or Ball canner jars. Examine and discard those with nicks, cracks and rough edges. These defects will not permit an air-tight seal. All jars should be washed in hot soapy water, rinsed well and then kept hot. This can be done in a dishwasher or by placing the jars in the water that is heating in your canner. The jars need to be kept hot to prevent breakage when they are filled with a hot product and placed in the kettle for processing.
Jars that will be filled with food and processed for less than 10 minutes in a boiling water bath canner need to be sterilized by boiling in water for 10 minutes. NOTE: If you are at an altitude of 1000 feet or more, boil an additional minute for each additional 1000 feet of altitude. (i.e.) 5000 feet=5 minutes longer.
Fruit Preparation
Gather fruit and vegetables early in the morning when they are at their peak of quality. Do not use over-ripe products. Gather or purchase only as much as you can prepare within 2 or 3 hours.
Wash products by either quick soaking and/or rinsing making sure to remove all dirt and sand including any chemicals that may be present. Dirt contains some of the bacteria that are hardest to kill. The cleaner the raw foods, the more effective the preserving process. Do not can decayed or damaged fruit. Do not let the food soak; it will lose flavor and nutrients.
Water Bath Canners
Fill the kettle with the appropriate amount of hot water and begin heating it on the range. The water bath requires 1 to 2 inches of water above the tops of jars. This can be difficult to determine before the filled jars are in place but after a batch or two you will learn how much water you you have to add. It is always a good idea to have an extra small pot of water heating just in case.
Packing Jars
Raw Pack (Cold Pack)
Pack raw fruit into jars and cover with boiling hot sugar syrup, juice or water. It is necessary to leave a head space between the lid and the top of food or liquid. This space is needed for the bubbling of liquids
and fruit expansion. If the jars are filled too full the contents may overflow during processing. The amount of head space is usually between 1/8 and 1/2 inch. Check the individual recipe for the exact amount of head space. Hot Pack
Heat fruit in syrup, in water or over steam before packing. Fruits with a high juice content and tomatoes can be pre-heated without adding liquid and then packed in the juice that cooks out.
To Fill Jars
Pack each jar to within 1/4 inch of top or as specified in individual recipe. For non-liquid foods(ie. peaches) it is necessary to remove any trapped air bubbles by running a rubber spatula or table knife gently between the solid product and the edge of the jar. Add more hot syrup as needed. Wipe rim and screw threads with a clean damp cloth, place lid on top and screw bands on tightly and evenly to hold rubber sealing lid (or sealing ring) in place. Sometimes it is necessary to position and hold down sealing lid while you tighten the band to insure the lid is centered on the top of the jar. Do not over-tighten. Jars are then ready to be placed on the rack inside hot water canner.
General Processing
Water Bath Method
Place jars on rack immediately after packing. Lower filled rack into canner. Jars should be covered by 1 to 2 inches of water. Add additional boiling water if needed. If you add more water, pour between jars and not directly on them (this is where the extra pot of heated water comes in handy). Cover pot with lid. When the water comes to a rolling boil, start to count the processing time. Boil gently and steadily for the time recommended for the food being processed. When the cooking time is up, remove jars at once and place on a rack or on towels away from heat and away from any draft.
Test for Seal
After jars have cooled between 12 and 24 hours after processing, check seal. To do this press down on the center of the lid. The lid should be con-caved and not move when pressed. Another method is to tap the lid with the bottom of a teaspoon. If the jar is sealed correctly, it will make a high-pitched sound. If it makes a dull sound it means the lid is not sealed or possibly that food is in contact with the underside of the lid. Do not be alarmed if during the first the first hour or so of cooling if you hear a popping sound come from the jars. This is a good sound to hear as it most often means that the vacuum effect has taken place which causes the lids to pop down and seal.
After jars have cooled thoroughly, the screw bands may be removed if desired. Be sure to label canned jars with content and processing date. Store jars in a cool dark, dry place.
If fruit is not covered by liquid it may darken during storage but does not necessarily mean it is spoiled. To avoid this be sure fruit is covered by 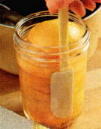 liquid while still leaving the recommended head space. Also be sure to remove trapped air bubbles with a slim rubber scraper, spatula or kitchen knife. To do this effectively, tilt the jar slightly while running the tool between the fruit and the edge of the jar and also pressing inward against the fruit a few times. liquid while still leaving the recommended head space. Also be sure to remove trapped air bubbles with a slim rubber scraper, spatula or kitchen knife. To do this effectively, tilt the jar slightly while running the tool between the fruit and the edge of the jar and also pressing inward against the fruit a few times.A spatula-shaped wooden spoon that has a flat end instead of rounded, is good to have for stirring sugar syrup in a flat bottomed pan during the cooking process. Avoid storing canned food near a furnace, water heater or hot water pipes. Jars need to be kept cool for longer storage life and to protect against spoilage. Be sure to store in a dry place. Rusting of the lid or band can cause seal to break. | |||||||||||||||||||||
| |||||||||||||||||||||
To prepare syrup, while heating water, add sugar slowly, stirring constantly to dissolve. Bring to a gentle boil. Fill jars while syrup is still boiling hot. | |||||||||||||||||||||
Good Things to Know
Canned fruits oftentimes will float if the sugar syrup is too heavy, if jars are packed too loosely or if air remains in the tissues of the fruit after processing. To avoid this use a light or medium sugar syrup, make sure fruit is firm and ripe and pack fruit tightly in jars without crushing.
Canned peaches, pears and apples may show a blue, red or pink color change after processing. This is sometimes the result of natural chemical changes that occur as fruits are heated.
Tips I Learned at the Fair, Some of Which I Never Knew Before!
I admit it, you CAN teach an old dog new tricks, and this old lady hound sure did get schooled at the fair!-Lift your jars straight up out of the water, don't tilt them to get the water off (I admit, I have always done this!) The water will evaporate off the lids while the jars are cooling. Tilting the jars could push food up into the headspace. Whoops! Guess I'll be pulling my jars straight up and out of the water from now on.
-After 24 hours, once you have confirmed your jars have sealed, you're supposed to take the rings off the jars before storing them. Otherwise, moisture could build up under there and you could end up with rust, which could erode your seal. Good thing there's no such thing as the Canning Police or I would be in some serious trouble if they took a gander down in my basement and saw all of my numerous canning jars with rings still on them. That's a big oops 10-4 right there!
-Canning jars can be FROZEN, lids and all! I have made freezer jam with those plastic freezer canning containers before but I never knew you could freeze the actual glass jars before. This tip really would have come in handy that time my veggies didn't seal right and I was forcing everyone to eat tons of veggies every day to use them up before they went bad! Probably not a good idea for things like pickles, though. I imagine they'd probably turn to mush.
Finally, to round out our boiling water canning method discussion, here's a recipe given to us by one of our canning instructors at the fair. Her name is Sherri Brooks Vinton and this recipe comes from her new book, "Put 'em Up!, a Comprehensive Home Preserving Guide for the Creative Cook. From Drying and Freezing to Canning and Pickling." I reallllly wanted to pick up Sherri's book at the fair as she was so knowledgeable and pretty down to earth, but I waited too long and they sold out. I'll have to see if I can find it online. Anyhow, here's Sherri's recipe for Spicy Carrots:
Spicy Carrots
Ingredients:
4-6 garlic cloves, sliced
1-2 jalapeno peppers, sliced, with seeds
1 tsp. red pepper flakes (optional)
2 lbs. carrots
4 C. distilled white vinegar
1 C. sugar
3 TBSP. Kosher salt
Prepare:
1. divide the garlic, sliced jalapenos, and pepper flakes (if using), among three clean, hot, pint canning jars. Trim, peel, and cut the carrots 1 inch shorter than the height of the jars. Pack the carrots into jars.
2. bring the vinegar to a boil in a large non-reactive saucepan. Add the sugar and salt and stir to dissolve. Pour the brine over the carrots, covering the vegetables by 1/2 inch with liquid. Leave 1/2 inch of headspace between the top of the liquid and the rim of the jar.
Can:
Use the boiling water method. Release trapped air bubbles. Wipe the rims clean; center lids on the jars and screw on jar bands, just until they are secure--do not tighten! Process for 15 minutes (from when the water starts to boil). Turn off heat, remove canner lid, and let jars rest in the water for 5 minutes. Remove jars and set aside for 24 hours. Check seals, then store in a cool, dark place for up to one year.
Pressure Canning
Once again, I bow to the expertise of the folks at Canning Food Recipes.com and give you their directions for pressure canning:
Follow manufacturer's instructions for opening and closing the pressure canner. Have 2 to 3 inches of hot water in pressure canner and stand the jars on the rack insert so they are not touching each other or the sides of the pot. Fasten lid and turn on heat. Steam, mixed with air, will start to flow from the vent. This is about 8 to 10 minutes after the first sign of steam. As the air is driven out from the canner, the steam will change from a white vapor or cloud to nearly invisible.
Start processing time when pressure has been reached or when weighted gauge begins to rock. It is then time to close the the pet-cock or regulator. Maintain a steady pressure during processing.
When processing time is up, remove the canner from heat and let the pressure return to zero without assistance. Standard heavy-walled canners take about 30 minutes when loaded with pints and about 45 minutes when loaded with quarts. Do not attempt to cool pot with cold water. This can cause liquid to escape from jars and keep lids from properly sealing. It can also cause pot warpage.
After pressure reaches zero, wait 2 minutes longer and then slowly open or remove the pet-cock or regulator. Unfasten cover and tilt the far side up so any steam remaining will escape away from you. Using a jar lifter, remove each jar and place on a dry, non-metallic surface or towel. Leave space between jars for air circulation.
After jars have cooled, test for seal and the screw bands may be removed if desired. Be sure to label canned jars with content and processing date. Store jars in a cool dark, dry place.
Processing Times
Processing, or canning times, are usually for an altitude of 0 to 1000 feet. If you are canning at a higher altitude, the times will need to be increased. This is because water has a lower boiling point at higher altitudes. Because of the lower boiling temperature the processing time is increased to ensure that the harmful bacteria is destroyed.
Water Bath Canner
For the Boiling Water Bath method, process an additional minute for each 1000 feet in elevation. (i.e.) 5000 feet=5 additional minutes of processing time.
Dial Gauge Pressure Canner
For pressure canning at higher altitudes the time remains the same but the pressure needs to be increased.
2000 to 4000 feet, 12 pounds pressure.
4000 to 6000 feet, 13 pounds pressure.
6000 to 8000 feet, 14 pounds pressure.
I find that I enjoy pressure canning more than the boiling water method. It's less messy and you know for sure your food is being safely processed. Plus, you don't have to constantly check to make sure there's enough water covering your jars or add water if it runs low. There's also something kind of satisfying about harnessing the power of steam in your kitchen. Must be something that rubbed off from Hubs taking me to see so many steam trains over the years! So that's all for today's lesson, folks. If you have any favorite canning recipes or tips, please leave them in the comments section or shoot me an email rebeccacichonowicz@gmail.com and I'll include them in my blog. Thanks again for reading! The next "lesson" will be on how to grow Shitake mushrooms. :)
No comments:
Post a Comment